Reassessing how you perform your day-to-day jobs is a positive step towards optimising the finish you deliver and the profit you make. Often, by making these simple improvements to the products you use or the techniques you apply can easily maximise the efficiency of your business, reduce key to key times and improve customer satisfaction. Here, rapid repair S.M.A.R.T specialist Wayne Beardmore, owner of Damage Undone, shares with us how he has improved his simple three-step scratch repair process by switching to Q1 automotive masking products.
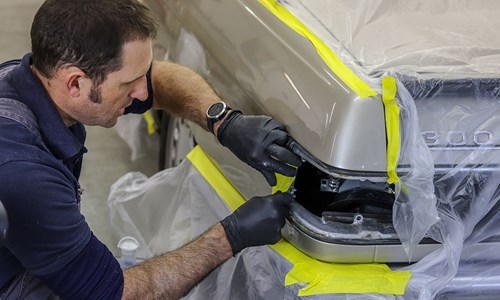
Cover the car entirely in Q1’s Premium Protecting Film, which statics to the body of the car for quick and effective coverage. It’s corona treated, so has electrostatic properties required to ensure the adhesion of paint during the refinishing process. Ensure the area to be repaired is clean and degreased, in this case the near side quarter panel.
Tape around the area to be refinished using Q1’s automotive-specific masking tape, this keeps your sanding localised. This tape performs exceptionally well tape-on-tape, which means you can be completely sure you’re fully protected. The tapes flexibility and strength allows you to bend it around bumpers and sage lines with ease and offers consistent unwinding for speed.
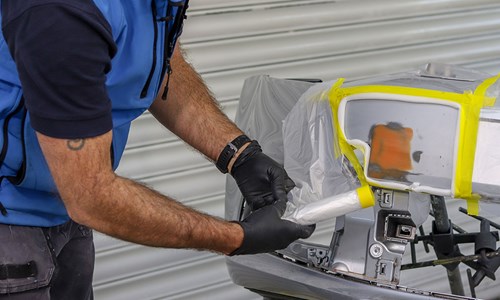
Sand down the damaged area using a 180-240 grit sanding paper before applying a small skim of glaze to fill the remaining scratch and level off the repair site. This will need to be fully cured. Wayne likes to use the Hot Bro curing lamp which is faster than conventional infra-red lamps, typically drying localised repairs in just one to two minutes. Next, use a dusting of guide coat to identify any high or low areas when sanding the filler until smooth. Wayne says: “Use your less dominant hand to feel over the area. This hand is more sensitive than the hand you use all the time.”
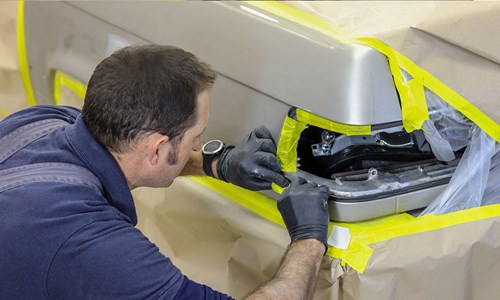
Using a 400 grit disc, key the area around the repair so that the primer adheres to the panel correctly. Wayne again likes to use the tape in this stage to keep the sanding localised and protect areas that will not need to be primed. Next, use Q1’s 13mm Premium Soft Edge Foam Masking Tape to create a small area ready for priming. This foam edge tape creates a really soft edge during priming, making it much easier to sand and get ready for paint. Wayne uses tape over the foam and pulls the plastic sheeting over the quarter panel he is repairing, making a hole the same size as the foam area and securing in place with more Q1 masking tape.
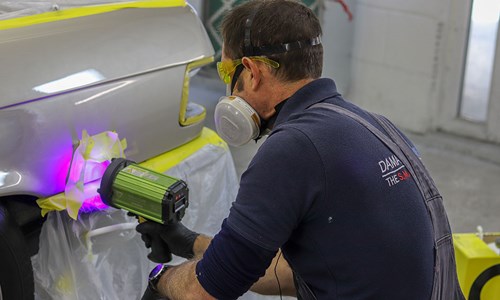
He then uses Glasurit UV primer and the Telsa Cure UV lamp, applying half a coat initially which cures in just 5-10 seconds under the lamp. Next, he applies 1 full coat, which cures under the UV lamp in 30-45 seconds. To be completely confident with your priming, peel away the foam leaving the rest of your masking in-situ and use a guide coat to identify any final imperfections.
Then, starting with a 400/600 grit disc, sand the primer down. Wayne likes to finish it off with 800 grit wet and dry for the best finish possible.
Prepare the entire panel for painting by repositioning the plastic sheeting and using Q1’s Premium Trim Masking Tape and paper to create a completely protective barrier for the areas which don’t require refinishing. The 13mm foam tape is great to fill the gaps between the car door and the quarter panel and the trim tape is ideal for masking around brake lights.
Finish your preparation with 13mm foam tape to give your paint a soft edge, before evenly applying your basecoat of choice and drying with a lamp. Wayne uses a scangrip to inspect the base coat to ensure the primer has been fully covered. Apply the required paint and clear coat and allow to fully cure before removing all the masking and preparing the car for customer to collect.
Q1 tape is quick and easy to remove, leaving no residue behind thanks to its natural rubber adhesive. It is also resistant to the high temperatures used during the lamp drying processes which means you can work with complete confidence.
Watch our how to video to see the full process.
Damage Undone made the switch to Q1 products after discovering for themselves the premium performance and quality of our range - Is it time you switched? Find out more about the range here.
Let's get in touch.
Keeping excellent masking products in your shop means selling efficiency and high productivity to your customers. Join the Q1® family to watch your business grow.