They might be small, but cracked and broken plastic panels can be some of the most difficult repairs to make. However, with a few tweaks you should be able to save the part and turn a tricky job into a solution that works for you and your customers. Being able to repair these parts will not only bring more work into your shop but also help the environment by reducing wastage.
Here, Rapid Repair Specialist Wayne Beardmore, owner of Damage Undone, gives his tips on plastic welding and explains how he honed his approach with the help of Q1 automotive masking products.
Firstly, identify the type of plastic you’re working on, majority of the bumpers will be Polypropolene (PP) and this is easy to work with. You can normally find this marked on the back of the panel or part, and this will tell you which plastic welding rod you need. Once you’ve got that information to hand, the next step is to make the surface as flat as possible.
Heat any protruding edges to ensure they align with the rest of the area, then use a die grinder and burr to create a groove along the crack. Using a Hot Air Welder melt the plastic welding rod into the channel you’ve created, making sure both substrates are fully joined.
Next, you’ll need to prepare the surface for skimming with glaze. To do this, sand the welded area level using a mini DA sander, starting off with a 50 or 80 grit disc. Protect any swage lines by running a length of tape along them; Q1’s automotive-specific masking tape bends nicely around curves, ensuring you to know where the edge is when you come to skim. Once the main section has been skimmed with a thin layer of glaze, peel back the tape and feed the skim carefully down over the swage line.
Now it’s time to sand. As with any filler or primer work, you should use a guide coat to view any imperfections, such as high or low spots, on the skimmed area. It’s important to protect any swage lines again with masking tape, before sanding. Sand the area again, then prepare it for priming with a DA sander and 400grit disc.
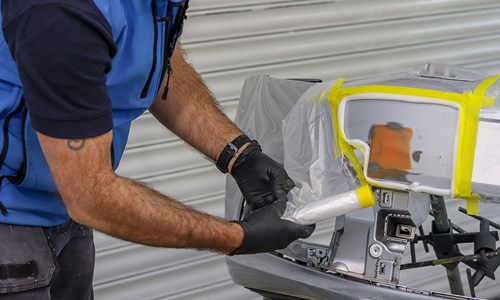
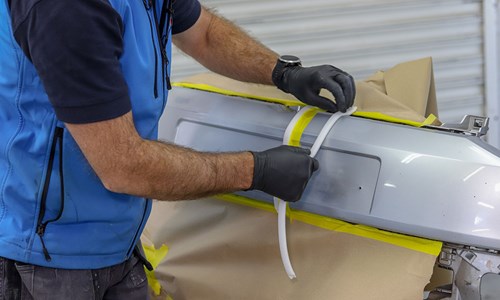
When it comes to priming, the aim is to make the area of repair as small as possible. Wayne likes to do this by making a soft border around the repair area with Q1’s 13mm Premium Soft Edge Foam Masking Tape.
You should also protect the rest of the car before priming. Q1’s Premium Masking Drop Film is easy to apply and is treated with corona to help it stick to the car with static. This makes for an altogether quicker priming process – Wayne uses Glasurit UV primer and the Telsa Cure UV lamp, which takes between 30 seconds to 1 minute to cure.
By this point, you’ll have made the repair, and skimmed and primed the area, but you’ll still need to make sure any areas of the car which don’t need painting are fully protected. Q1’s Premium Trim Masking Tape and paper are just the ticket, enabling you to paint, lacquer and fade with confidence.
Wayne also uses Q1’s 13mm Premium Soft Edge Foam on the blending out areas.
Finally a light polish is applied using Farecla G360 over the fade out area to finish the job off.
Damage Undone made the switch to Q1 products after experiencing the premium performance quality for themselves – is it time you switched? Find out more here.
Let's get in touch.
Keeping excellent masking products in your shop means selling efficiency and high productivity to your customers. Join the Q1® family to watch your business grow.